
ClaudePanel
Claude Code External Status Display
ClaudePanel is a small hardware indicator that shows what your coding agent is doing right now — whether it’s processing your prompt, waiting on you to approve a tool, finished its turn, or stuck on something — so you can glance at a panel on your desk instead of watching your terminal. It’s built for Claude Code, and works with any agent that implements Claude Code’s plugin architecture — GitHub Copilot CLI is the tested example.
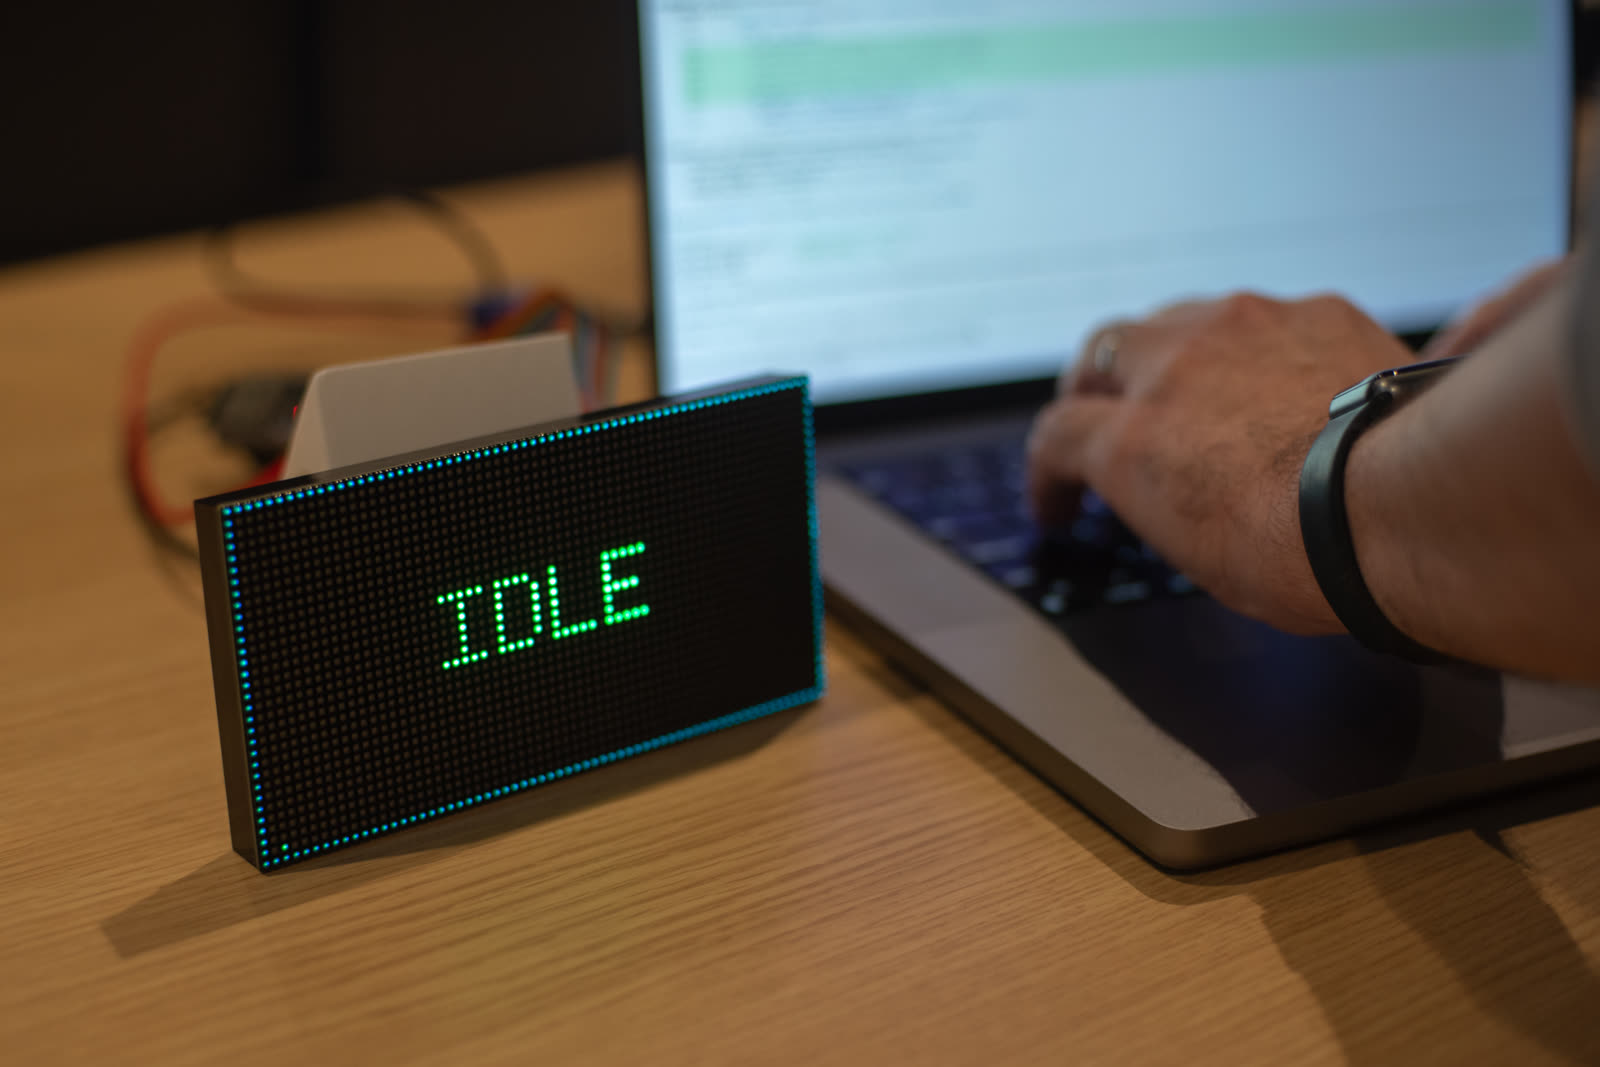
Turn finished — the panel goes green while you're the bottleneck.
The Panel
The panel renders one of six states at any given time, picked to be distinguishable at a glance from across a desk:
| State | Meaning |
|---|---|
| idle | Claude has finished its turn; waiting for you. |
| working | Claude is actively processing your prompt. |
| thinking | Claude is in the middle of a response but hasn’t |
| called a tool for a while — usually composing. | |
| blocked | Claude needs your input (permission prompt, etc.) |
| compacting | Claude Code is summarizing the conversation |
| history — usually a 10–60s pause. | |
| error | A tool call returned an error. |
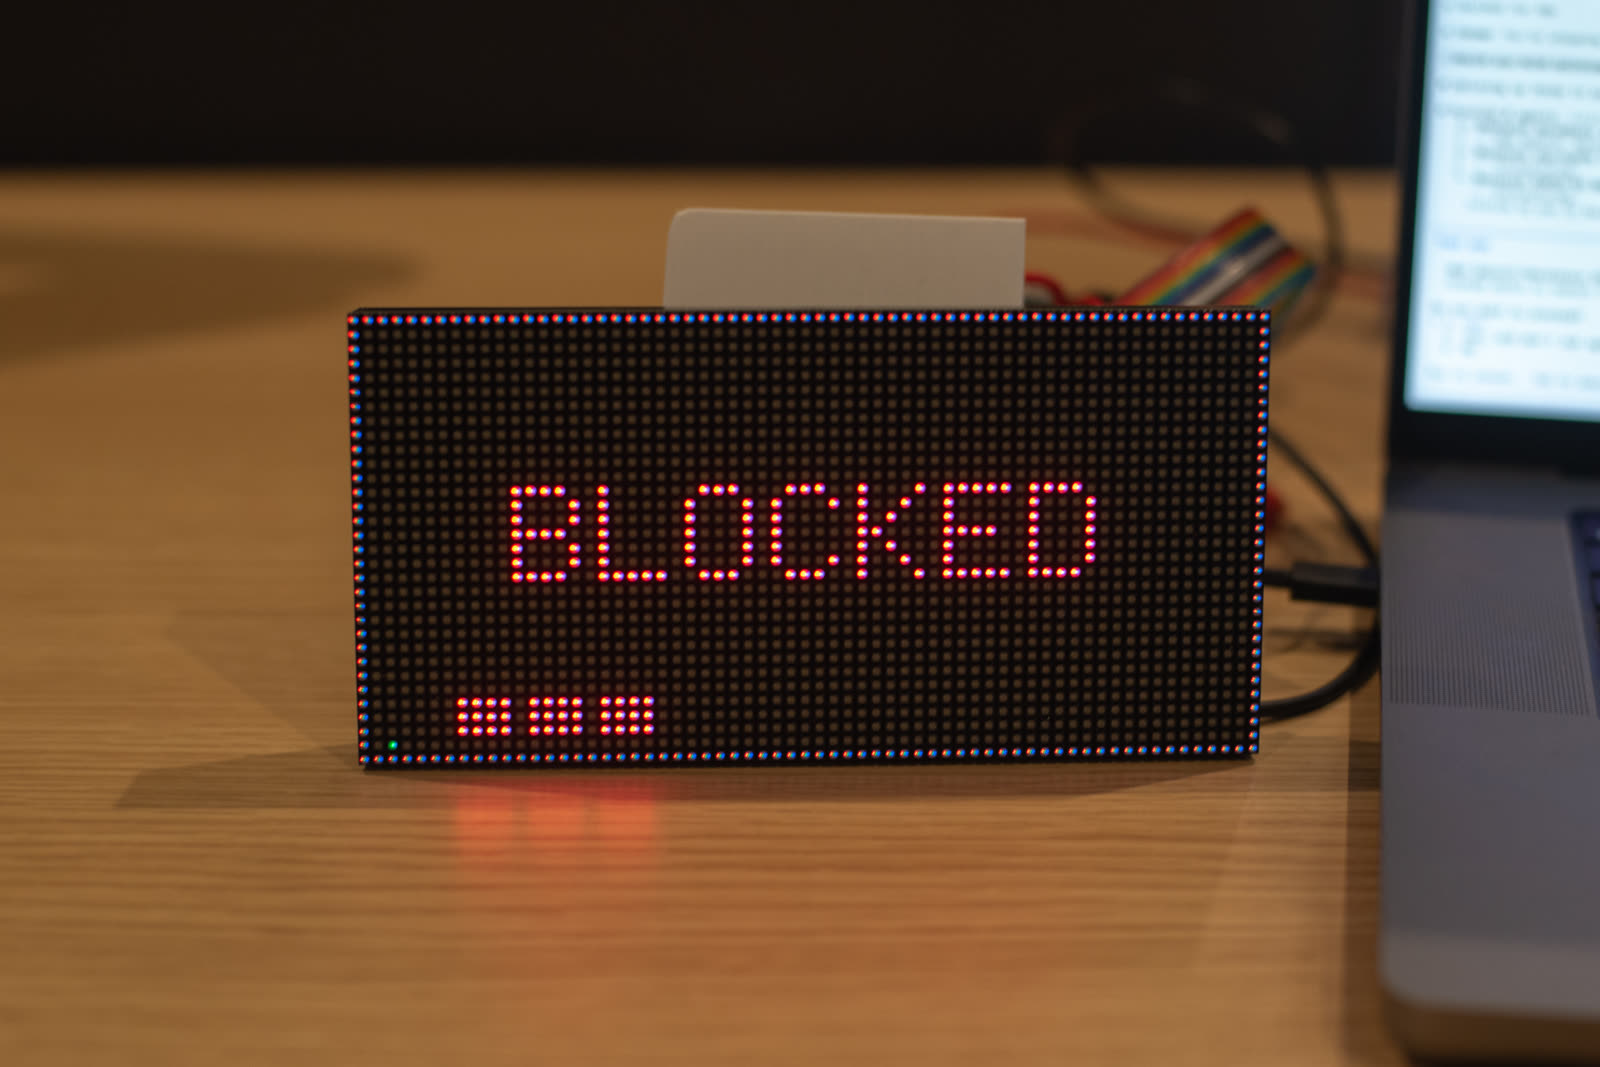
blocked — the agent wants a permission decision and you're across the room.
Alongside the state, the panel also shows running counts of subagents and active tasks — handy when you’ve kicked off parallel work and want to monitor it without scrolling the terminal. (You can see the counter dots along the bottom edge of the photo above.)
A single firmware instance can drive one panel or a chain of up to four 64×32 panels, with each panel optionally split into two half-panel “client slots” so multiple Claude Code sessions can share a display.
How it works
When you write a prompt in your agent, ClaudePanel converts that keystroke into pixels in three hops:
- The plugin (this repo) hooks every agent lifecycle event
—
UserPromptSubmit,Stop,PreToolUse,PostCompact, and so on — and publishes a small JSON event for each one to a local TCP broker on your machine. - The bridge subscribes to the broker, runs a state machine over the event stream (idle / working / thinking / blocked / compacting / error), and forwards each state change as a one-line JSON message over USB serial.
- The firmware on the ESP32-S3 reads the serial line, picks the right palette and glyph, and updates the HUB75 panel’s framebuffer.
The whole loop is fast enough that the panel reacts within a few hundred milliseconds of you pressing Enter.
 Claude Code  ──►  Plugin  ──►  Bridge  ──►  Firmware  ──►  Display
                  (Python)    (cross-     (ESP32-S3)     (RGB matrix
                              platform)                   panel)
Each piece lives in its own repo and is the source of truth for its own internals. See Repos at the bottom.
Installation
ClaudePanel has three pieces and they need to come up in a specific order: firmware first, then bridge, then plugin. Each piece has detailed docs of its own — this page is the orientation that ties them together.
1. Flash the firmware
Build and flash the ESP32-S3 firmware to your panel hardware. You’ll need ESP-IDF v6.0 installed locally and a HUB75 panel wired up (default expectation is a 64×32 WaveShare RGB-Matrix-P2.5; multi- panel chains are supported).
Once flashed, plug the ESP32-S3 into your computer over USB. It
enumerates as a serial device — COM5 on Windows, /dev/cu.usbmodem*
on macOS, /dev/ttyACM0 on Linux — and the panel boots into an
“unknown” state, ready to receive events.
2. Install + configure the bridge
The bridge is a system-tray app (Windows notification area / macOS menu bar / Linux status icon) that subscribes to the plugin’s local broker and forwards each Claude Code event to the firmware over USB serial. Cross-platform installers ship on every release.
That page auto-detects your OS and shows the right download
(Setup.exe on Windows, .dmg on macOS, .AppImage on Linux). It
also covers the OS-specific quirks (SmartScreen on Windows,
Gatekeeper on macOS, tray-host extensions on GNOME). After install,
right-click the tray icon → Connect device to point the bridge
at the ClaudePanel you connected in step 1.
3. Install the plugin
The plugin (this repo) is the Claude Code half of the system: it hooks every lifecycle event and publishes the state stream the bridge subscribes to.
Prerequisite: Python 3 installed. The plugin’s hook and slash
commands invoke scripts via python3 ... || python ... — the polyglot
that picks the right interpreter on every platform:
- macOS / Linux / WSL: the
python3branch wins (Homebrew, pyenv, system package manager — anything that putspython3onPATH). - Windows:
python3doesn’t exist on a typical Windows Python install, so the||falls through topython, which is Py3 from the python.org or Microsoft Store installer. It must be a real Python install — thepython/python3App Execution Alias stubs that open the Microsoft Store don’t count.
Which agents can drive the panel?
The plugin is built as a Claude Code plugin, and any agent that implements Claude Code’s plugin architecture can run it:
| Host | Panel states | Slash commands | Slot pairing | Status |
|---|---|---|---|---|
| Claude Code (CLI) | ✅ | ✅ /llmstatus:* |
✅ commands or env | Tested |
| Copilot CLI (≥ 1.0.66) | ✅ | ✅ (as skills) | ✅ commands or env | Tested |
| Claude Code in VS Code / JetBrains | ✅ | ✅ | ✅ | Expected — same engine as the CLI, shares its install |
| VS Code Copilot (agent mode) | ✅ expected | ⚠️ may not surface in chat | env var | Expected — untested; native-Windows caveat below |
| JetBrains Copilot | ⏳ | ⏳ | ⏳ | Untested — moving to the Copilot CLI harness, which we support |
| Copilot cloud agent (github.com) | — | — | — | n/a — runs in GitHub’s cloud, no path to the USB panel on your desk |
Pick your host for the specifics:
Install from inside Claude Code:
/plugin marketplace add sep/cc-status-plugin
/plugin install llmstatus@llmstatus-market
Then run the one-time permission setup so Claude Code stops asking to approve every plugin-driven Bash invocation:
/llmstatus:permit
If you have a multi-panel chain (rather than a single 64×32), tell the firmware once — the layout is cached in NVS so it survives reboots:
/llmstatus:configure 2
/llmstatus:help lists every slash command the plugin provides.
IDE extensions: the Claude Code extensions for VS Code and
JetBrains run the same engine and share the CLI’s ~/.claude install —
nothing extra to do. Sessions opened in the IDE drive the panel exactly
like terminal sessions.
The same plugin installs into copilot (≥ 1.0.66), whose plugin
protocol is Claude-compatible. Same marketplace, same commands, from
inside a Copilot session:
/plugin marketplace add sep/cc-status-plugin
/plugin install llmstatus@llmstatus-market
/llmstatus:permit
Copilot sessions then drive the panel exactly like Claude sessions and can share slots with them. Copilot-flavored notes:
/llmstatus:permitwrites Copilot’spermissions-config.json(command approvals + path-prompt allowlisting for the status dir), scoped per repo/directory — re-run it once in each repo where you use the panel.CLAUDE_STATUS_SLOT=1 copilotbinds the session to slot 1 at launch, no slash command needed.- On Windows, make sure
pythonis a real install, not the Microsoft Store alias stub. -
After installing or updating the plugin, start a fresh session (or
/restartthe current one). Hooks bind at session creation — a resumed session keeps the hook registration it started with, so commands will chat back happily while the panel stays dark.</div>
(Using the Claude Code extension instead? See the Claude Code tab — it shares the CLI install.)
VS Code’s agent-plugin system auto-detects Claude-format plugins and
runs their hooks, so Copilot agent mode can drive the panel. The
smoothest path is to install via Copilot CLI first (see that tab) —
VS Code auto-discovers plugins from ~/.copilot/installed-plugins/.
Alternatively, use Chat: Install Plugin From Source from the
command palette.
Caveats (this host is documented-but-untested — reports welcome):
- Plugin slash commands may not surface in VS Code chat. Pair the
session to a slot with the env var instead: launch VS Code from a
shell with
CLAUDE_STATUS_SLOT=1set, or bind from a CLI session. -
Native Windows is unverified; if the panel stays dark, launch with
CLAUDE_STATUS_DEBUG=1in the environment and check~/.claude-status/debug.logfor what (if anything) the hooks received.</div>
(Using the Claude Code plugin instead? See the Claude Code tab — it shares the CLI install.)
Untested, but converging on supported: GitHub is moving JetBrains Copilot to Copilot CLI as its agent harness. On builds using the CLI harness, the Copilot CLI install (see that tab) applies as-is — sessions run through the same CLI the plugin already supports.
On older builds with JetBrains’ native hooks, only a subset of
lifecycle events fires (notably no Stop), so the panel may not
return to idle between turns. If you try it, we’d love a report
either way.
Verify
Send any prompt in Claude Code. The panel should light up — yellow
while Claude is working, green when it goes idle. Run
/llmstatus:identify to flash each physical panel’s slot ID
large and centered, so you can confirm wiring matches what the
firmware thinks the layout is.
If nothing happens, the bridge’s tray icon’s Show logs menu item is the first place to look.
Commands
The panel has numbered slots (1, 2, …) and optional half-slots
(1a, 1b, …) that each render one Claude session’s state. Slash
commands move sessions between slots; bridge subcommands manage the
bridge process itself. Most users only ever need the everyday tier.
Plugin slash commands
Run these inside Claude Code (with the plugin installed).
Everyday
| Command | What it does |
|---|---|
/llmstatus:show <slot> |
Bind this session to slot N (e.g. 1, 2b). Displaces any prior occupant. |
/llmstatus:hide |
Stop sending this session to the display. |
/llmstatus:status |
Show which sessions are bound to which slots. |
/llmstatus:identify [N] |
Flash each panel’s slot ID for N seconds (default 5). |
Setup
| Command | What it does |
|---|---|
/llmstatus:configure <N> |
Tell the firmware your panel-chain length (1–4). |
/llmstatus:permit |
One-time: allowlist the plugin’s Bash invocations so |
| commands stop prompting. | |
/llmstatus:reset |
Wipe all session slot bindings — clean slate. |
/llmstatus:help |
List every slash command, briefly. |
CLI pairing
If you routinely pair a fresh session to the same slot, set the
CLAUDE_STATUS_SLOT env var when invoking claude — the plugin’s
SessionStart hook reads it and auto-binds the session to that slot
before you type anything:
CLAUDE_STATUS_SLOT=1 claude
Compose with shell aliases for different slots:
alias c1='CLAUDE_STATUS_SLOT=1 claude'
alias c2='CLAUDE_STATUS_SLOT=2 claude'
The same env var pairs Copilot CLI sessions — the plugin’s SessionStart hook doesn’t care which agent invoked it:
alias gh1='CLAUDE_STATUS_SLOT=1 copilot'
Bridge CLI
Run these in a terminal (or in pwsh on Windows). Most users won’t need to — the tray menu covers Connect device / Show logs / Pause / Quit. The bridge install page documents each subcommand in detail.
Repos
- Plugin (this site): cc-status-plugin
- Bridge: cc-status-bridge
- Firmware: cc-status-display